Blog

Selling your iPhone can be a smart way to recover value before upgrading. But preparing it correctly is critical. Failing to remove personal data, disable security locks, or document the device’s condition can reduce resale value—or worse, expose sensitive information.
This comprehensive guide explains exactly how to prepare your iPhone before selling it, following security best practices, Apple-recommended steps, and resale optimization strategies.
Why Proper Preparation Matters
An iPhone stores:
- Photos and videos
- Banking apps
- Saved passwords
- Email accounts
- Personal documents
- Location history
- Health data
Simply deleting photos is not enough. If you skip proper sign-out and erase procedures, the new owner may be blocked by Activation Lock—or your data may remain recoverable.
Proper preparation protects:
- Your privacy
- Your Apple ID security
- Your resale value
- The buyer’s experience
Step 1: Back Up Your Data First


Before erasing anything, create a full backup.
Option A: iCloud Backup
- Connect to Wi-Fi
- Go to Settings → Tap your name
- Tap iCloud → iCloud Backup
- Select “Back Up Now”
Option B: Backup to Computer
- On macOS Catalina or later: Use Finder
- On older macOS or Windows: Use iTunes
This ensures your photos, contacts, and messages can be restored to your next device.
Step 2: Sign Out of Your Apple ID (Critical Step)

This is the most important step.
If you do not sign out, the phone remains linked to your account through Activation Lock.
- Open Settings
- Tap your name at the top
- Scroll down
- Tap “Sign Out”
- Enter your Apple ID password
This removes Find My iPhone and disables Activation Lock.
Step 3: Unpair Apple Watch (If Applicable)
If your iPhone is paired with an Apple Watch:
- Open the Watch app
- Tap your watch
- Tap “Unpair Apple Watch”
Unpairing automatically creates a backup of the watch.
Step 4: Transfer or Remove eSIM / SIM Card
Remove your physical SIM card using a SIM tool.
If you use eSIM: Contact your carrier to transfer or deactivate the line.
Never sell a device with an active carrier line attached.
Step 5: Erase All Content and Settings

After signing out of Apple ID:
- Go to Settings
- Tap General
- Tap Transfer or Reset iPhone
- Tap “Erase All Content and Settings”
- Confirm
The device will reset to factory settings and display the “Hello” setup screen.
This ensures complete data removal.
Step 6: Clean the Device Properly
Physical appearance directly affects resale value.
Cleaning Tips:
- Use microfiber cloth
- Lightly dampen with 70% isopropyl alcohol
- Avoid harsh cleaners
- Remove dust from charging port gently
A clean device can increase perceived value significantly.
Step 7: Assess the Condition Honestly
Buyers and trade-in programs evaluate:
- Screen cracks
- Scratches
- Battery health
- Camera functionality
- Face ID / Touch ID performance
- Charging port stability
You can check battery health under:
Settings → Battery → Battery Health & Charging
Transparency builds trust and avoids disputes.
Step 8: Gather Original Accessories (If Available)
Including:
- Original box
- Charger
- Cable
- Documentation
Original packaging can improve resale price, especially for recent models.
Step 9: Research Market Value
Resale value depends on:
- Model (e.g., iPhone 13 vs iPhone 14)
- Storage capacity
- Condition
- Carrier status
- Battery health
Compare:
- Trade-in programs
- Local buyers
- Online marketplaces
Be realistic about pricing based on condition.
Step 10: Decide: Private Sale vs Trade-In
Private Sale
Pros:
- Higher potential payout
Cons: - Requires time and negotiation
- Risk of scams
Trade-In
Pros:
- Faster
- Safer
- Immediate credit
Cons: - Lower payout
Choose based on convenience vs maximum value.
Step 11: Protect Yourself During the Sale
If selling privately:
- Meet in a public place
- Verify payment before handing over
- Avoid shipping without verified payment
- Keep a record of device IMEI
You can find IMEI under:
Settings → General → About
Step 12: What Not to Do
Avoid these common mistakes:
- Forgetting to sign out of Apple ID
- Selling without factory reset
- Leaving SIM card inside
- Hiding damage
- Ignoring buyer verification
These mistakes cause disputes and reduce trust.
Data Security: Why It’s Non-Negotiable
Modern smartphones store financial and identity data.
A proper factory reset after signing out:
- Encrypts and wipes user data
- Removes personal credentials
- Prevents future access
This step is essential for digital security.
How Device Condition Impacts Resale Value
Here’s what affects price most:
| Factor | Impact on Value |
| Screen cracks | High negative impact |
| Battery under 80% health | Moderate impact |
| Scratches | Low to moderate |
| Carrier locked | Moderate |
| Unlocked device | Higher resale |
| Storage size | Higher storage = higher value |
Improving condition before selling (like replacing a cracked screen) can sometimes increase net profit.
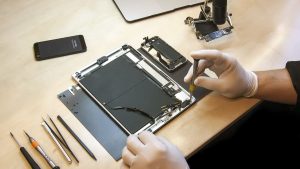
Is It Worth Repairing Before Selling?
Sometimes yes.
Repair makes sense when:
- Screen damage significantly lowers value
- Battery health is very low
- Repair cost is less than resale gain
However, always calculate the repair cost vs expected increase in resale price before proceeding.
Final Checklist Before Selling
- Backed up data
- Signed out of Apple ID
- Disabled Find My iPhone
- Unpaired Apple Watch
- Removed SIM/eSIM
- Factory reset completed
- Cleaned device
- Documented condition
- Verified market value
If all boxes are checked, your iPhone is ready for sale.
Final Thoughts
Preparing your iPhone before selling it is not just about resetting the device—it’s about protecting your personal data, ensuring a smooth buyer experience, and maximizing your resale value.
By following proper backup, sign-out, and factory reset procedures, you eliminate security risks and prevent activation lock issues. Taking a few extra minutes to clean and inspect the device can also improve your final selling price.
A careful, structured approach ensures a secure and profitable transaction.